How to
Everything you need to know about the Skialper Buyer's Guide. FAQ to be read and consulted whenever you have any doubts in order to better understand the meaning and significance of our work.
- Author: Davide Marta
- Photographer: Nicola DamonteGiovanni DanieliFederico Ravassard

01 - OUR APPROACH
We’ve been publishing the Buyer’s Guide for 12 years now, but for about another dozen before that we’ve been testing equipment for mountaineering and skimo.
In our approach, we seek, first and foremost, to be professional. The gear we get our hands on — and our feet in — is something R&D departments have worked long and hard on to provide us with new solutions and high performance. Evaluating it all to help all you skimo enthusiasts to guy the right kit is serious business, well, at least as far as you can call going up and down snowy mountains on skis “serious”. The reviews you will find in this guide are not based solely on what our (extremely talented) testers tell us, as some have mistakenly thought. Trying out a pair of skis, boots, or bindings on the snow is definitely where the rubber meets the road, so to speak, but it’s just one of the many aspects that lead to the final review.

To this we add the unmatched industry know-how of the coordinators of the Buyer’s Guide, who have been analyzing products like these for years and know their strengths and weaknesses in detail. We know the designers. We know the models that came before and how each of them has evolved. We know their successes and failures, the issues they had after release, and the feedback from their users. When a new product hits the market, it’s as if we’ve mapped its genome, and that makes all the difference in the world. In early winter, when the Buyer’s Guide has been out for a few weeks, we’ve already started planning for the next one. We’re out testing the latest gear on days the brands set aside for industry experts, going to industry trade shows, and picking out everything that looks interesting to us. Then we get them from the manufacturers in the sizes we think are best and make sure they’ve given us new gear, as if it had just come off the shelf. We also ask that they give us all the time we need for testing (which is never less than five months).

By late March, if we’ve had no delays, all the equipment is finally in the hands of our editorial team. This year, we moved up race testing to the end of March, right after the Adamello Ski Raid. Then we start with all the product shoots (which runs through at July in our in-house photo studio) before moving on to lab testing of the various products to measure them, check the edge and base finish of the skis, and subject the products to various tests using our exclusive instrumentation. We have the equipment set up by our lab partner (XL Mountain in Quincinetto, Italy) so that every category has the same setup and wax. Then we give the skis all the same bindings from ATK Bindings, a longstanding partner of ours, as well as the Ski Trab TR1 for the freeride skis.

The boots are measured and weighed. Their mechanics are lab tested, and we try them out with all the crampons to assess compatibility. Only then are they ready for testing out on the snow. For bindings, too, after all the relevant measurements, we test them using our certified Wintersteiger equipment.
Then out on the snow, we gather all the impressions of our testers and, of course, take a few cool photos. After we’ve done all this, we put the pieces together, write the reviews, edit them, and work on the layout. And on it goes, discussing the reviews, comparing notes, and making other changes. But not just to what we write in our reviews. How exactly we write them also counts.

So more corrections, endless tweaks, and mountains of data. When the Buyer’s Guide finally hits the shelves, all the products are sent back to their manufacturers. We don’t keep any of it. This, too, is about being professional. As is the fact that, to be in the Skialper Buyer’s Guide, no brand has ever had to pay us a cent. And one final note. Bringing together 151 skis, 78 boots and 48 bindings, not to mention all the accessories, then testing them all, is no easy task. This year, with the launch of the digital edition of the Buyer’s Guide in both Italian and English, it was all that much more complicated, and time was that much tighter. But we did it.
02 - HOW TO USE OUR SPEC SHEETS
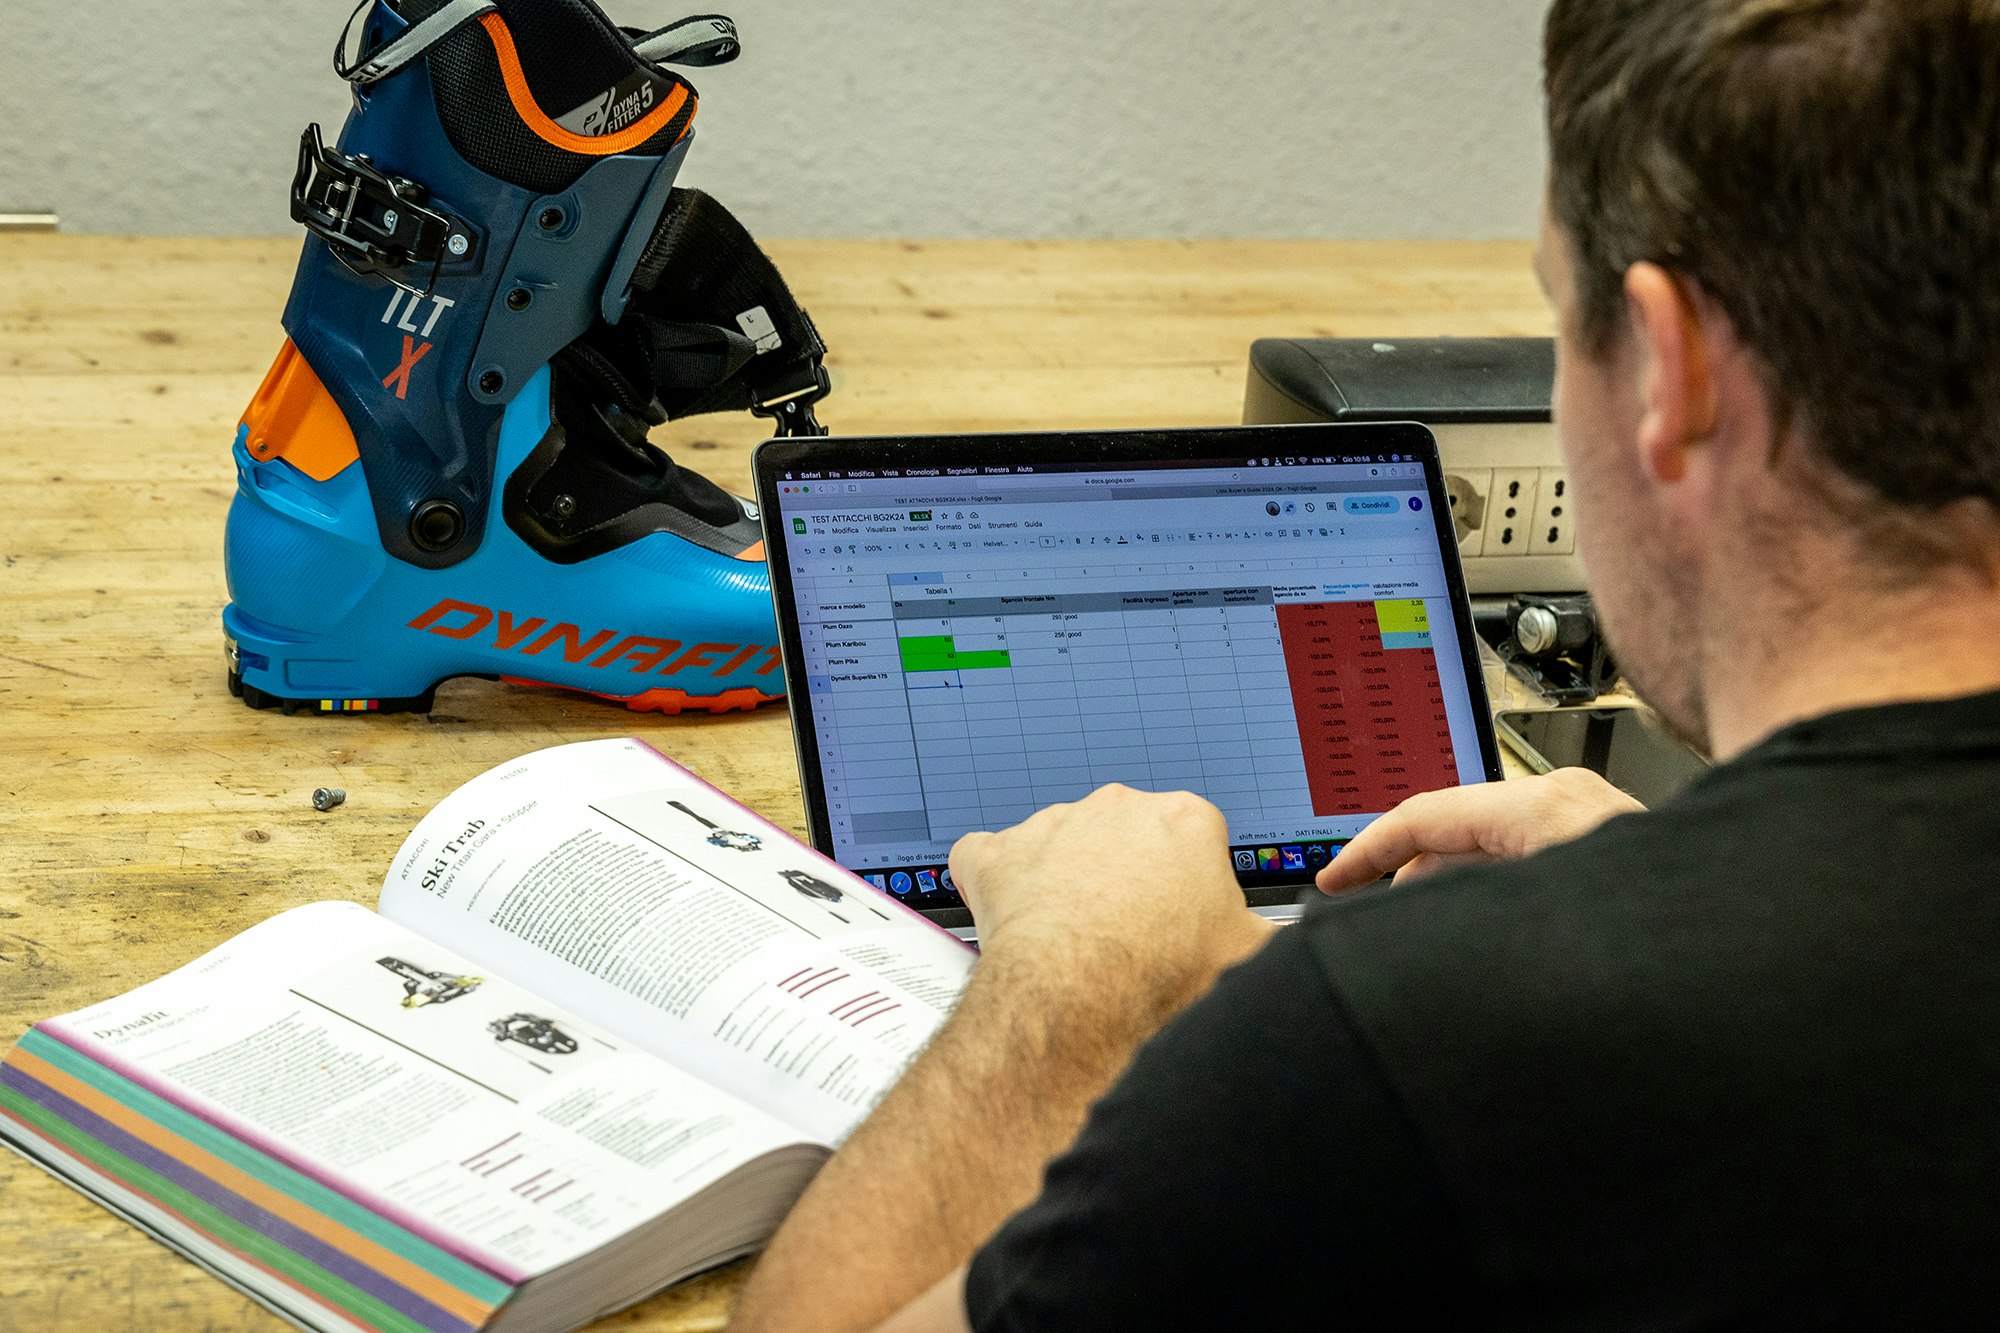
There is so much information and so much measured data in the Buyer's Guide for each product.
The full-page or two-page spec sheets for the skis, boots and bindings (in the TESTED section) are accompanied by the numbers provided by the manufacturers (marked with an asterisk) alongside our own measurements. On the following pages, we describe the approach we took in measuring and reporting these numbers.
SKI MEASUREMENTS
Length: measured in centimeters using a measuring tape from tip to tail along the base of the ski.
Sidecut: measured in millimeters (at tip, waist and tail) using a digital caliper at the widest point of the tip and tail of the ski (without the edge contact) and at the narrowest point at the waist.
Curve radius: expressed in meters using an exclusive formula based on the sidecut measurements above, the contact area, and the length as measured above.
Edge contact: laser measurement of the base contact area, eliminating camber under constant pressure, expressed in centimeters.

Weight: the weight of the two skis without bindings as measured by a certified digital scale. The weight is shown for both skis (in parentheses) and the average of the two weights. Weight is expressed in grams. When available, the weight specified by the manufacturer is also indicated if different from our own measurements.
Tip and tail rocker: placing the ski on a level surface, we measured the distance between highest point of the tip and tail and the point of contact of the ski with the surface.
Bridge: placing the ski on a level surface, we took laser measurements of the maximum distance between the ski base and the surface. This is expressed in centimeters.
Load-bearing surface: calculated by way of an exclusive formula and expressed in square centimeters. This takes account of the measurements of both sidecut and contact area.
SKI LAB TESTS
Torsion: our exclusive equipment applies the same torsional force at the tip, waist and tail of each ski. The ski is held in place. An inclinometer measures the torsion at the various points of the ski (edge contact points for tip and tail, area in front of the binding toe piece for our standard test of waist torsion). The number is expressed in degrees.
Flex: our equipment applies constant force to the waist of the ski, and the ski is positioned in such a way that it is allowed to bend. By laser, we measure the difference (in millimeters) between the starting position of the ski and the position reached after the force is applied.
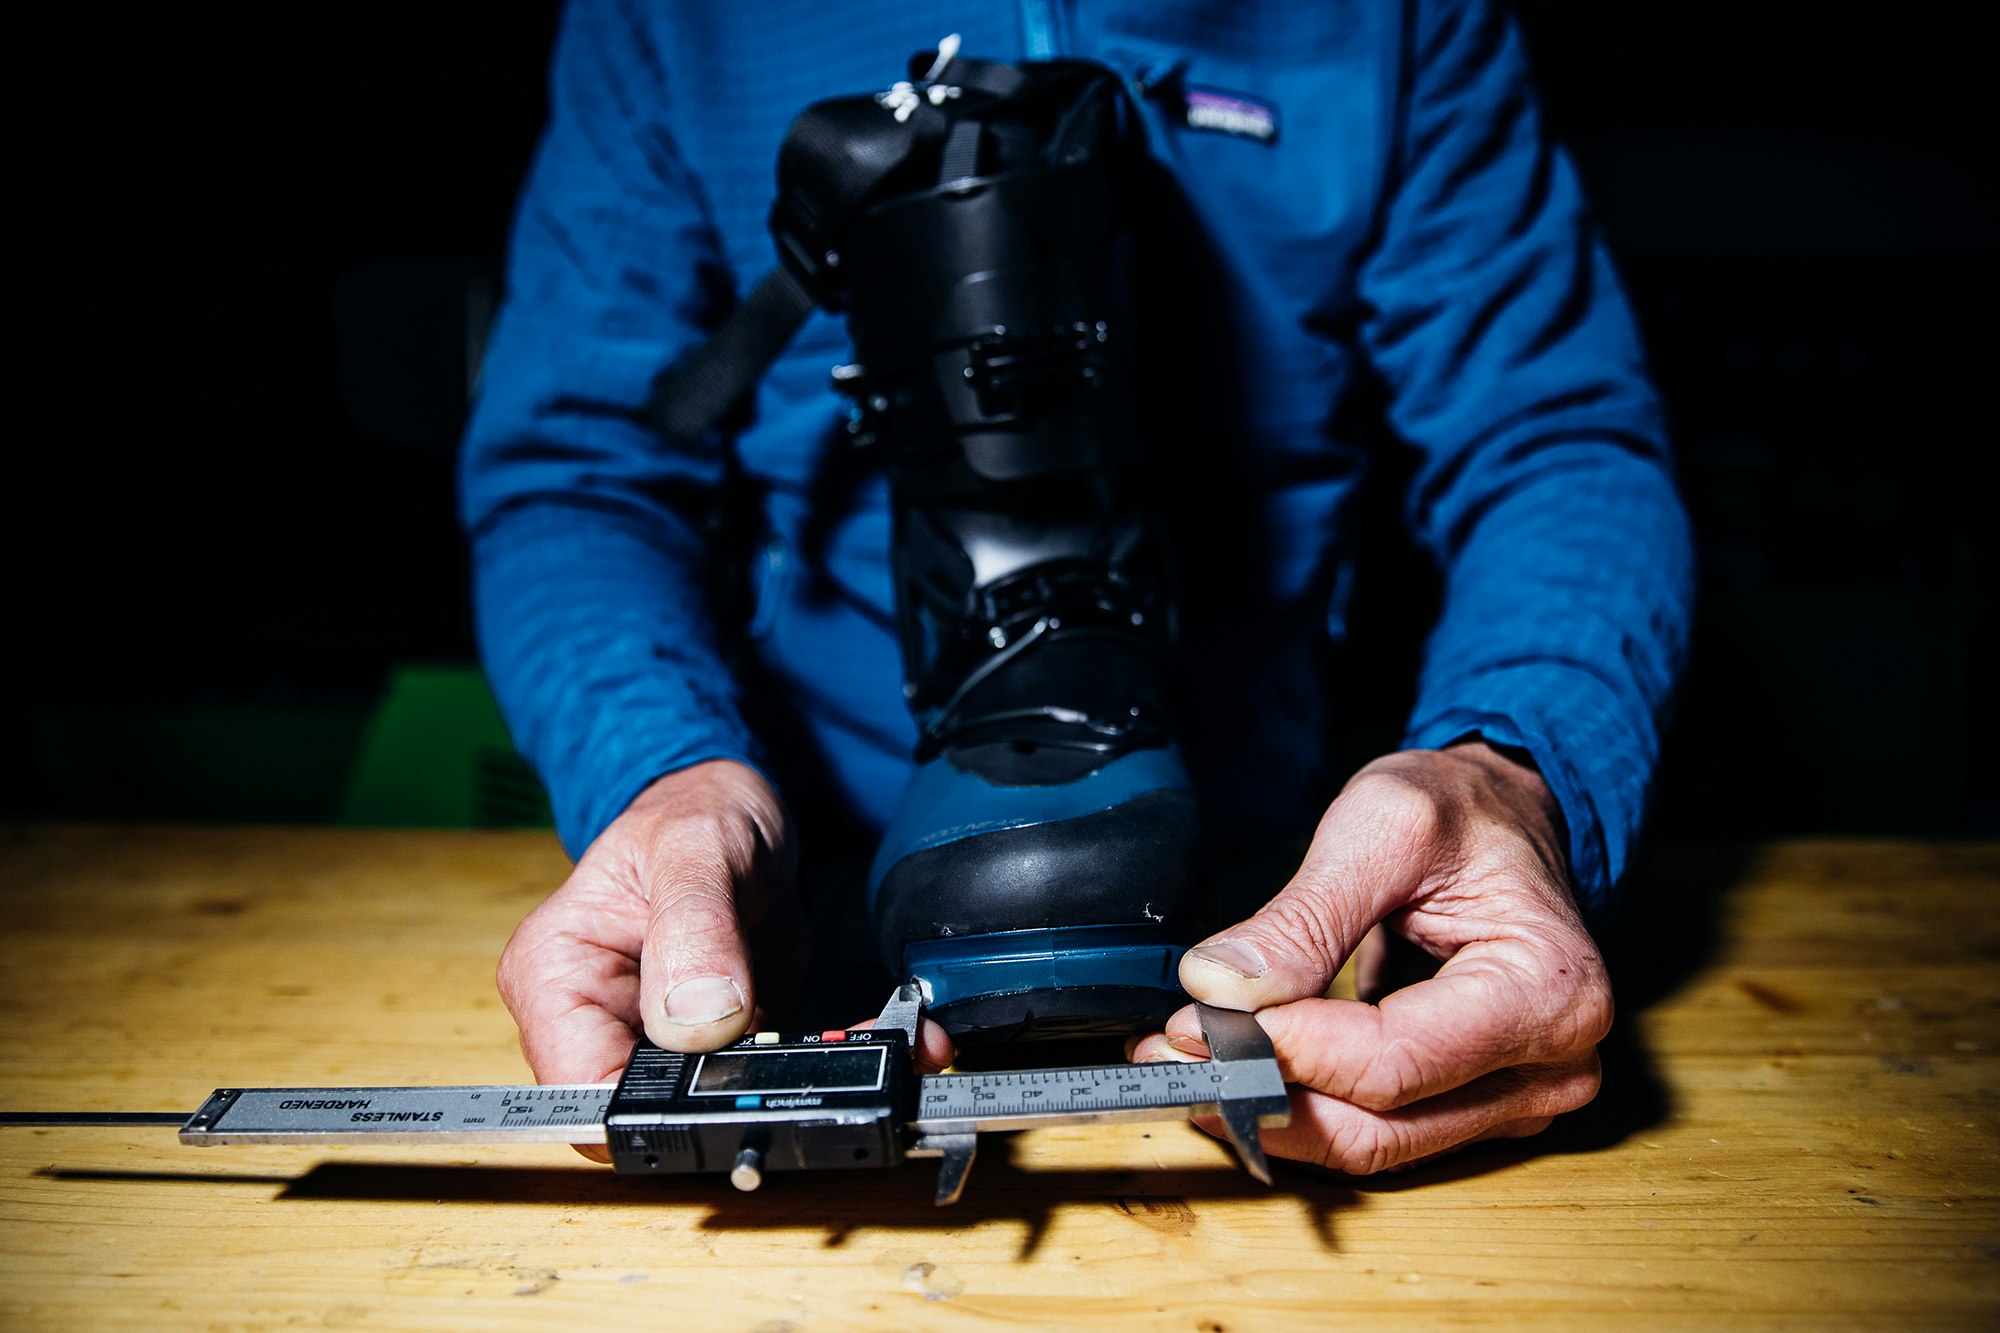
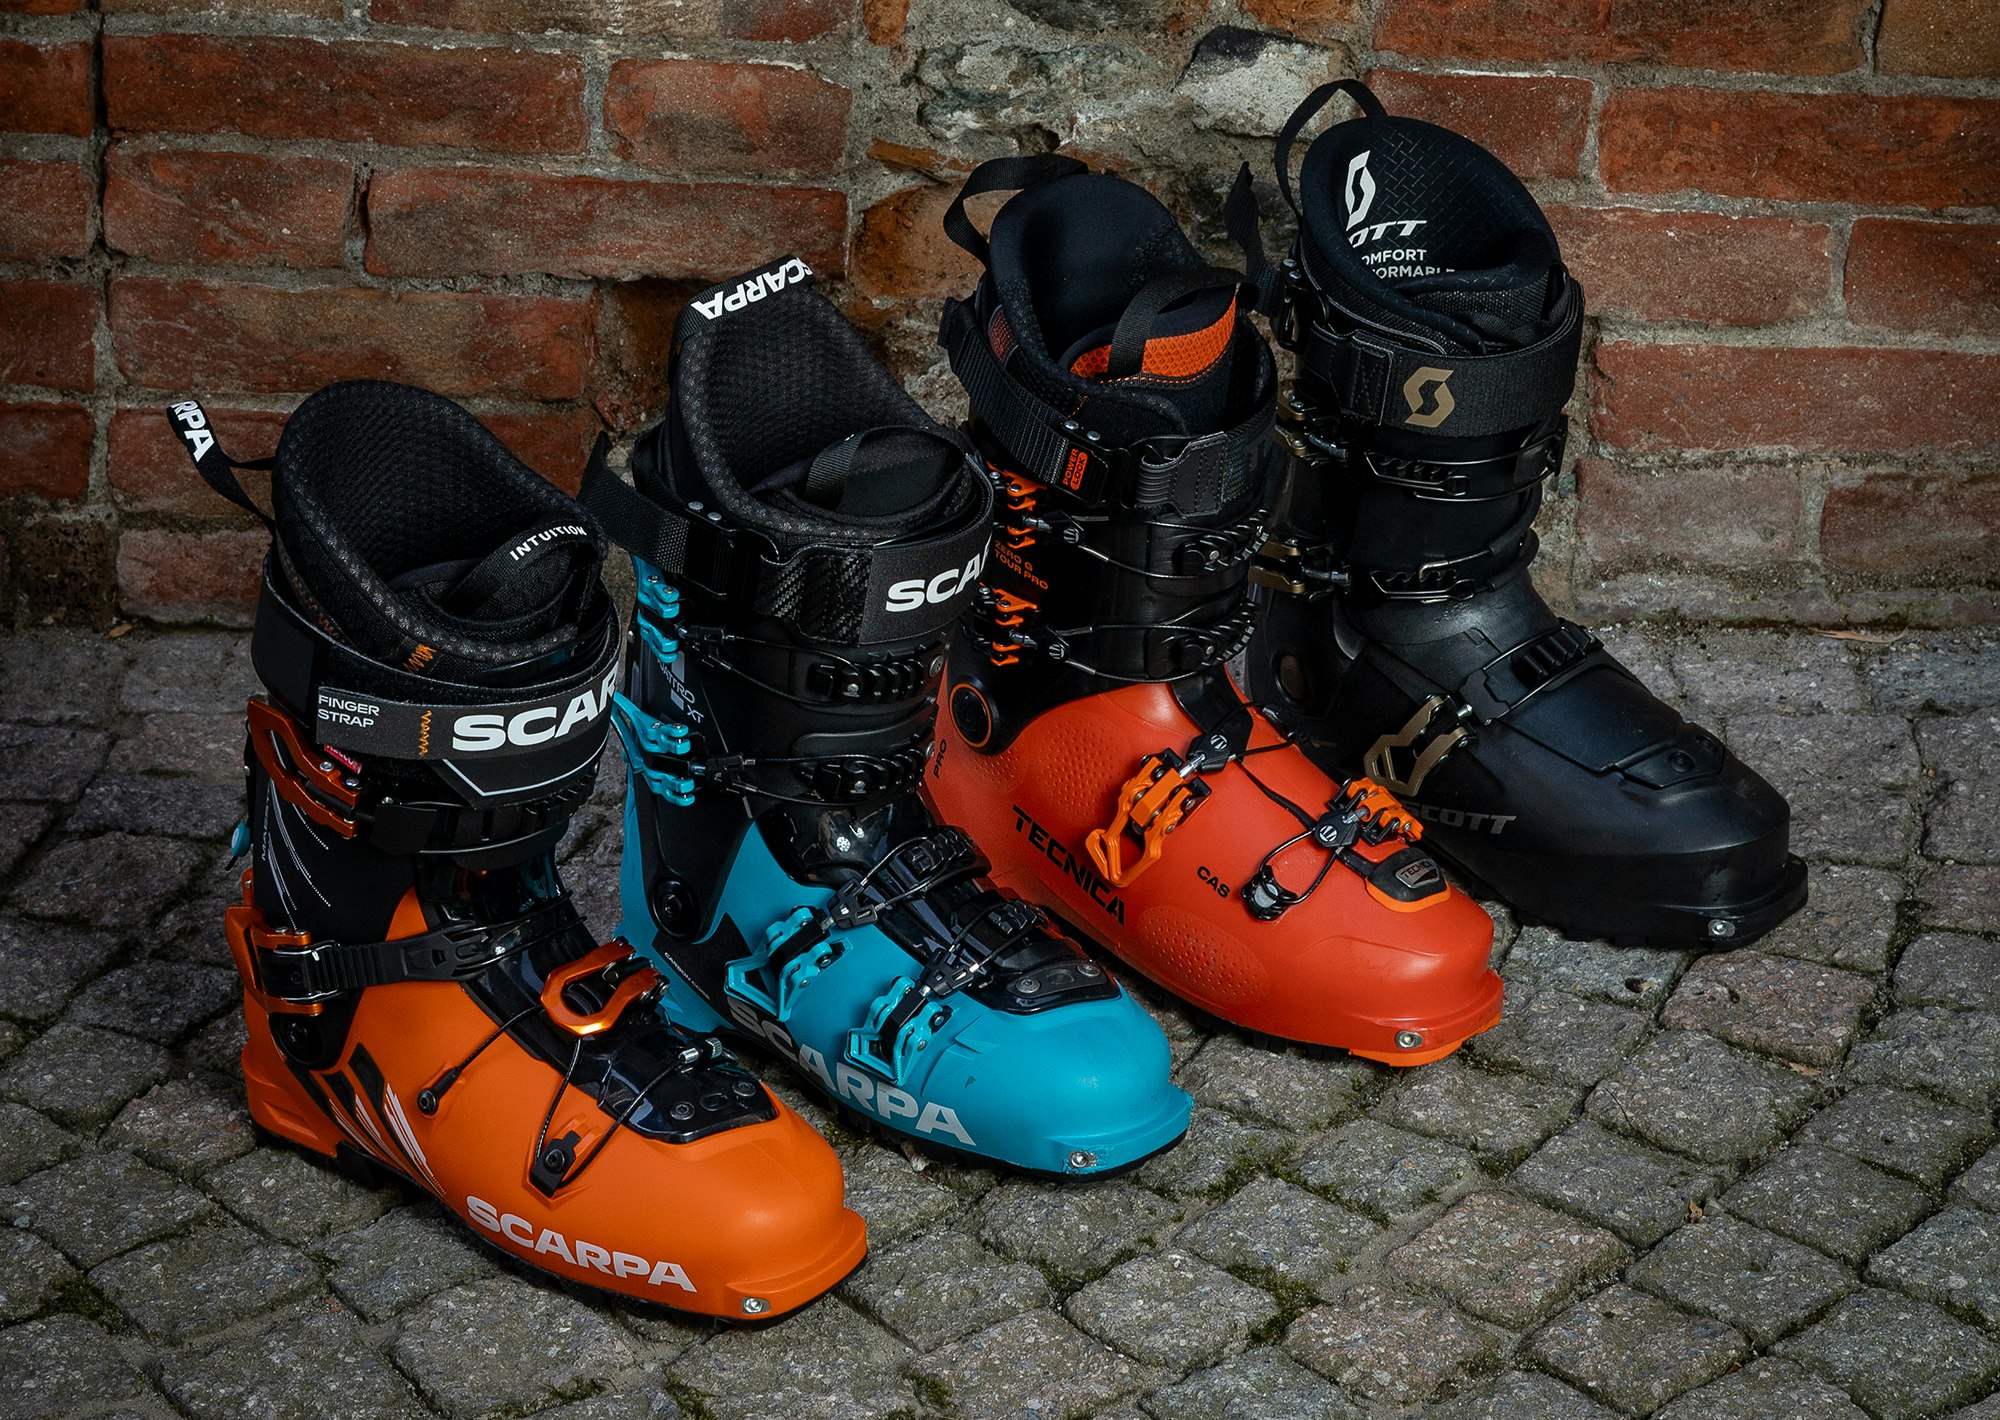
BOOT MEASUREMENTS
Outer shell length: measured in millimeters with a tape measure from toe to heel along the sole of the boot.
Outer shell width: measured in millimeters using a digital caliper at the widest point of the boot.
Weight: expressed in grams for one entire boot. Measured using a certified digital scale. When available, the weight specified by the manufacturer is also indicated if different from our own measurements.
Shell weight: the weight of the boot’s shell alone, i.e. without the liner (see Weight above).
Liner weight: the weight of the boot’s liner alone, i.e. removed from the shell (see Weight above).
Internal shell length: laser measurement (in millimeters) from heel to toe inside the shell of the boot.
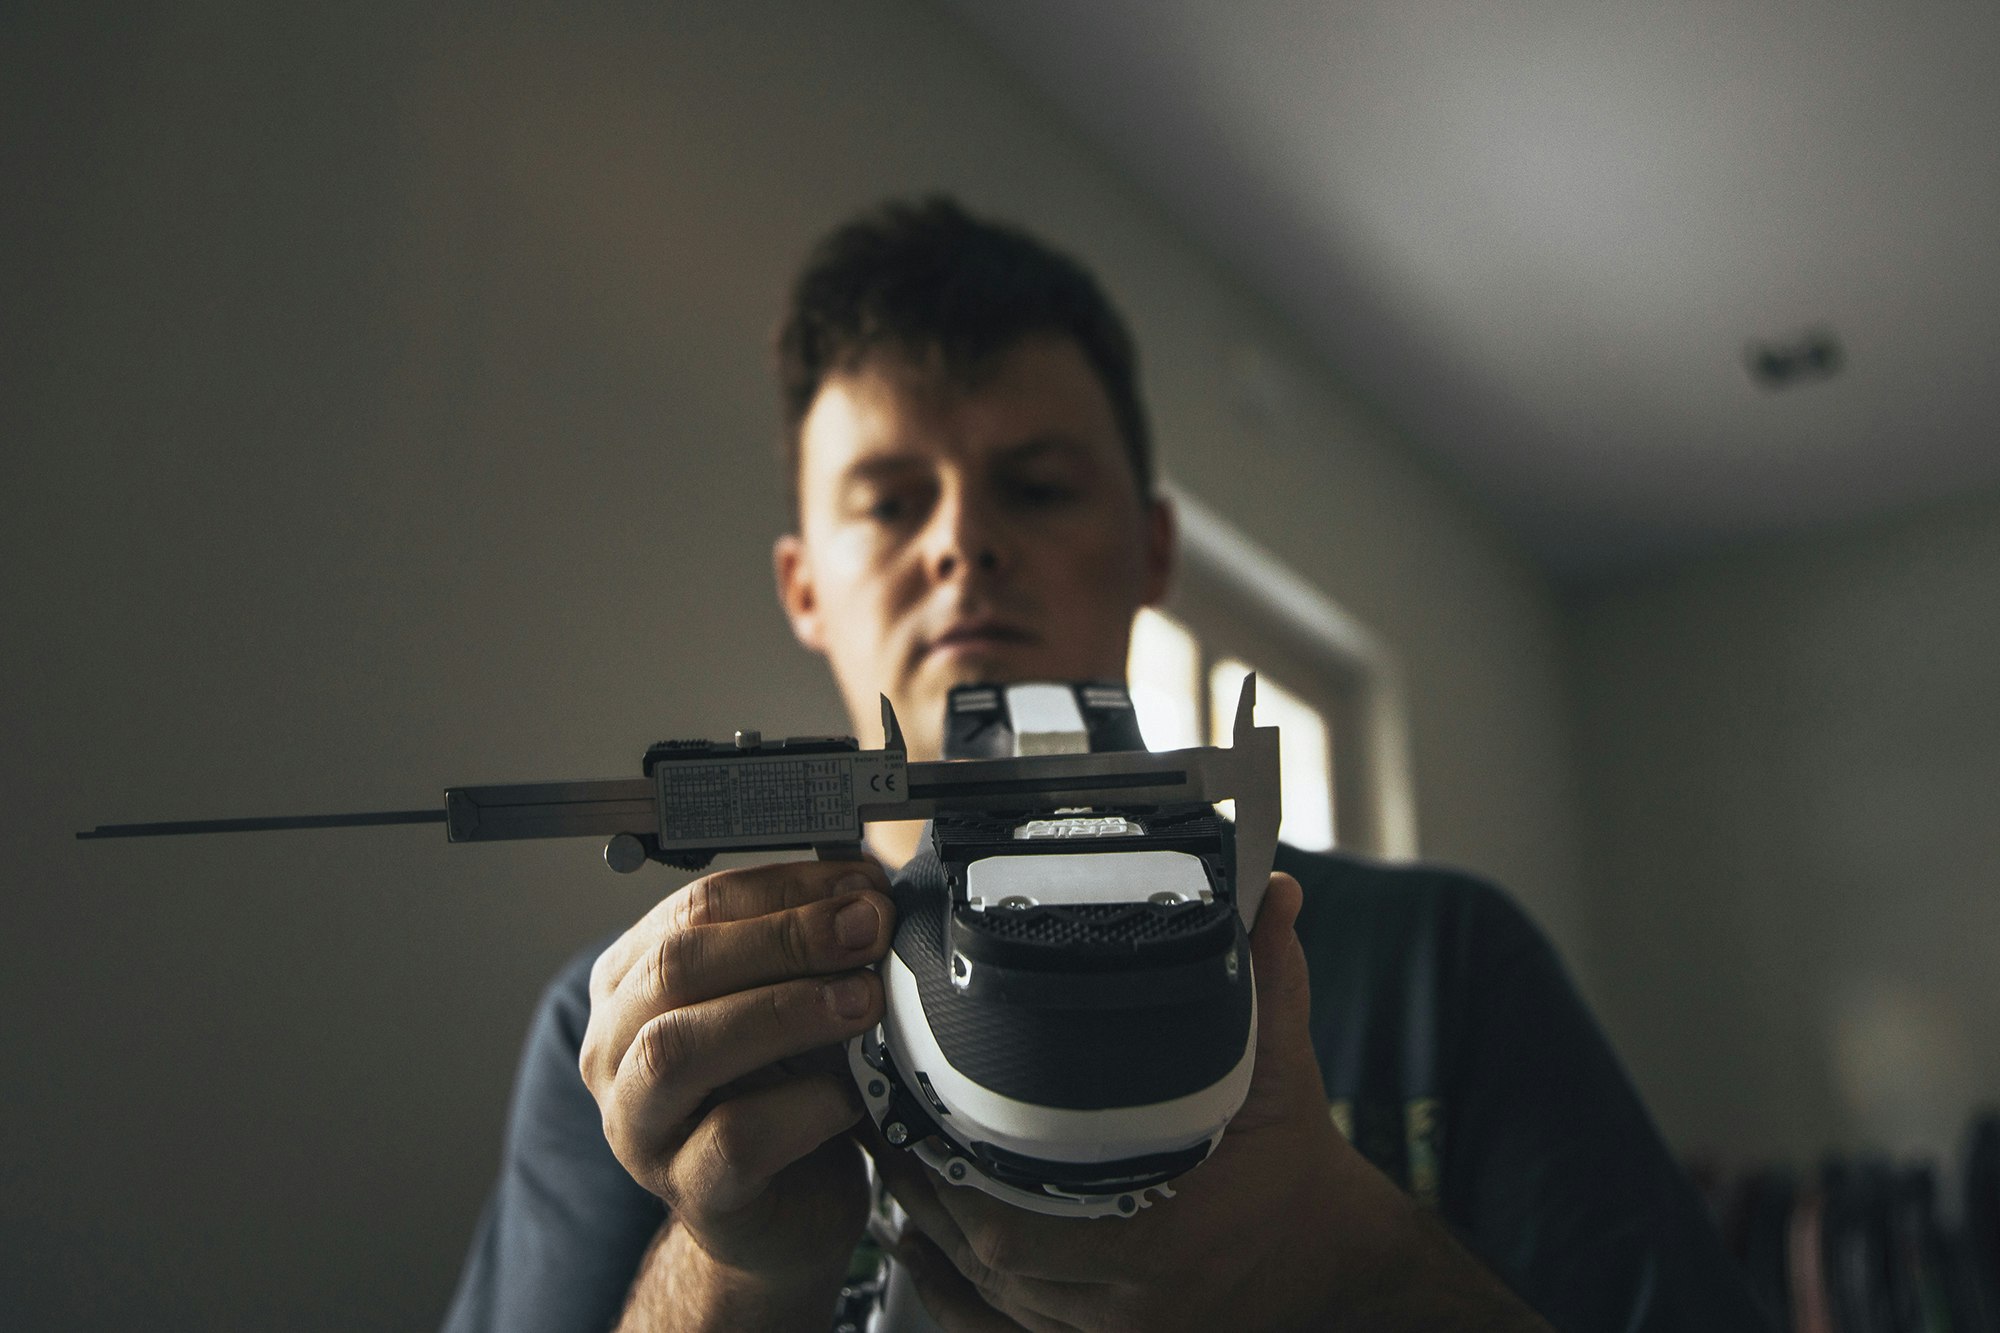
Max. forefoot width: measurement (in millimeters) using our exclusive instrument for measuring the widest point inside the foot area of the boot.
Max. ankle width: measurement (in millimeters) using our exclusive instrument for measuring the ankle area inside the boot.
Max. shaft height: laser measurement (in millimeters) from the heel inside the boot to the highest point of the highback.
Max. tongue height: laser measurement (in millimeters) from the insole to the highest point below the tongue of the boot.
Pin distance: caliper measurement (in millimeters) of the distance between the two pin inserts at the toe of the boot.
Sole thickness as toe: measurement (in millimeters) using a digital caliper to measure the thickness of the rubber sole at the toe of the boot.

BOOTS: FLEX, INSULATION AND SUSTAINABILITY
This season, we have added new lab tests with the help of the University of Bologna’s Sport Technology Lab, coordinated by Prof. Martino Colonna. This is something we began two years ago, with more general analyses, and has now led to the inclusion of new data on the boots tested, with the exception of the Race and Women’s categories. See the related article for more information.
BINDING MEASUREMENTS
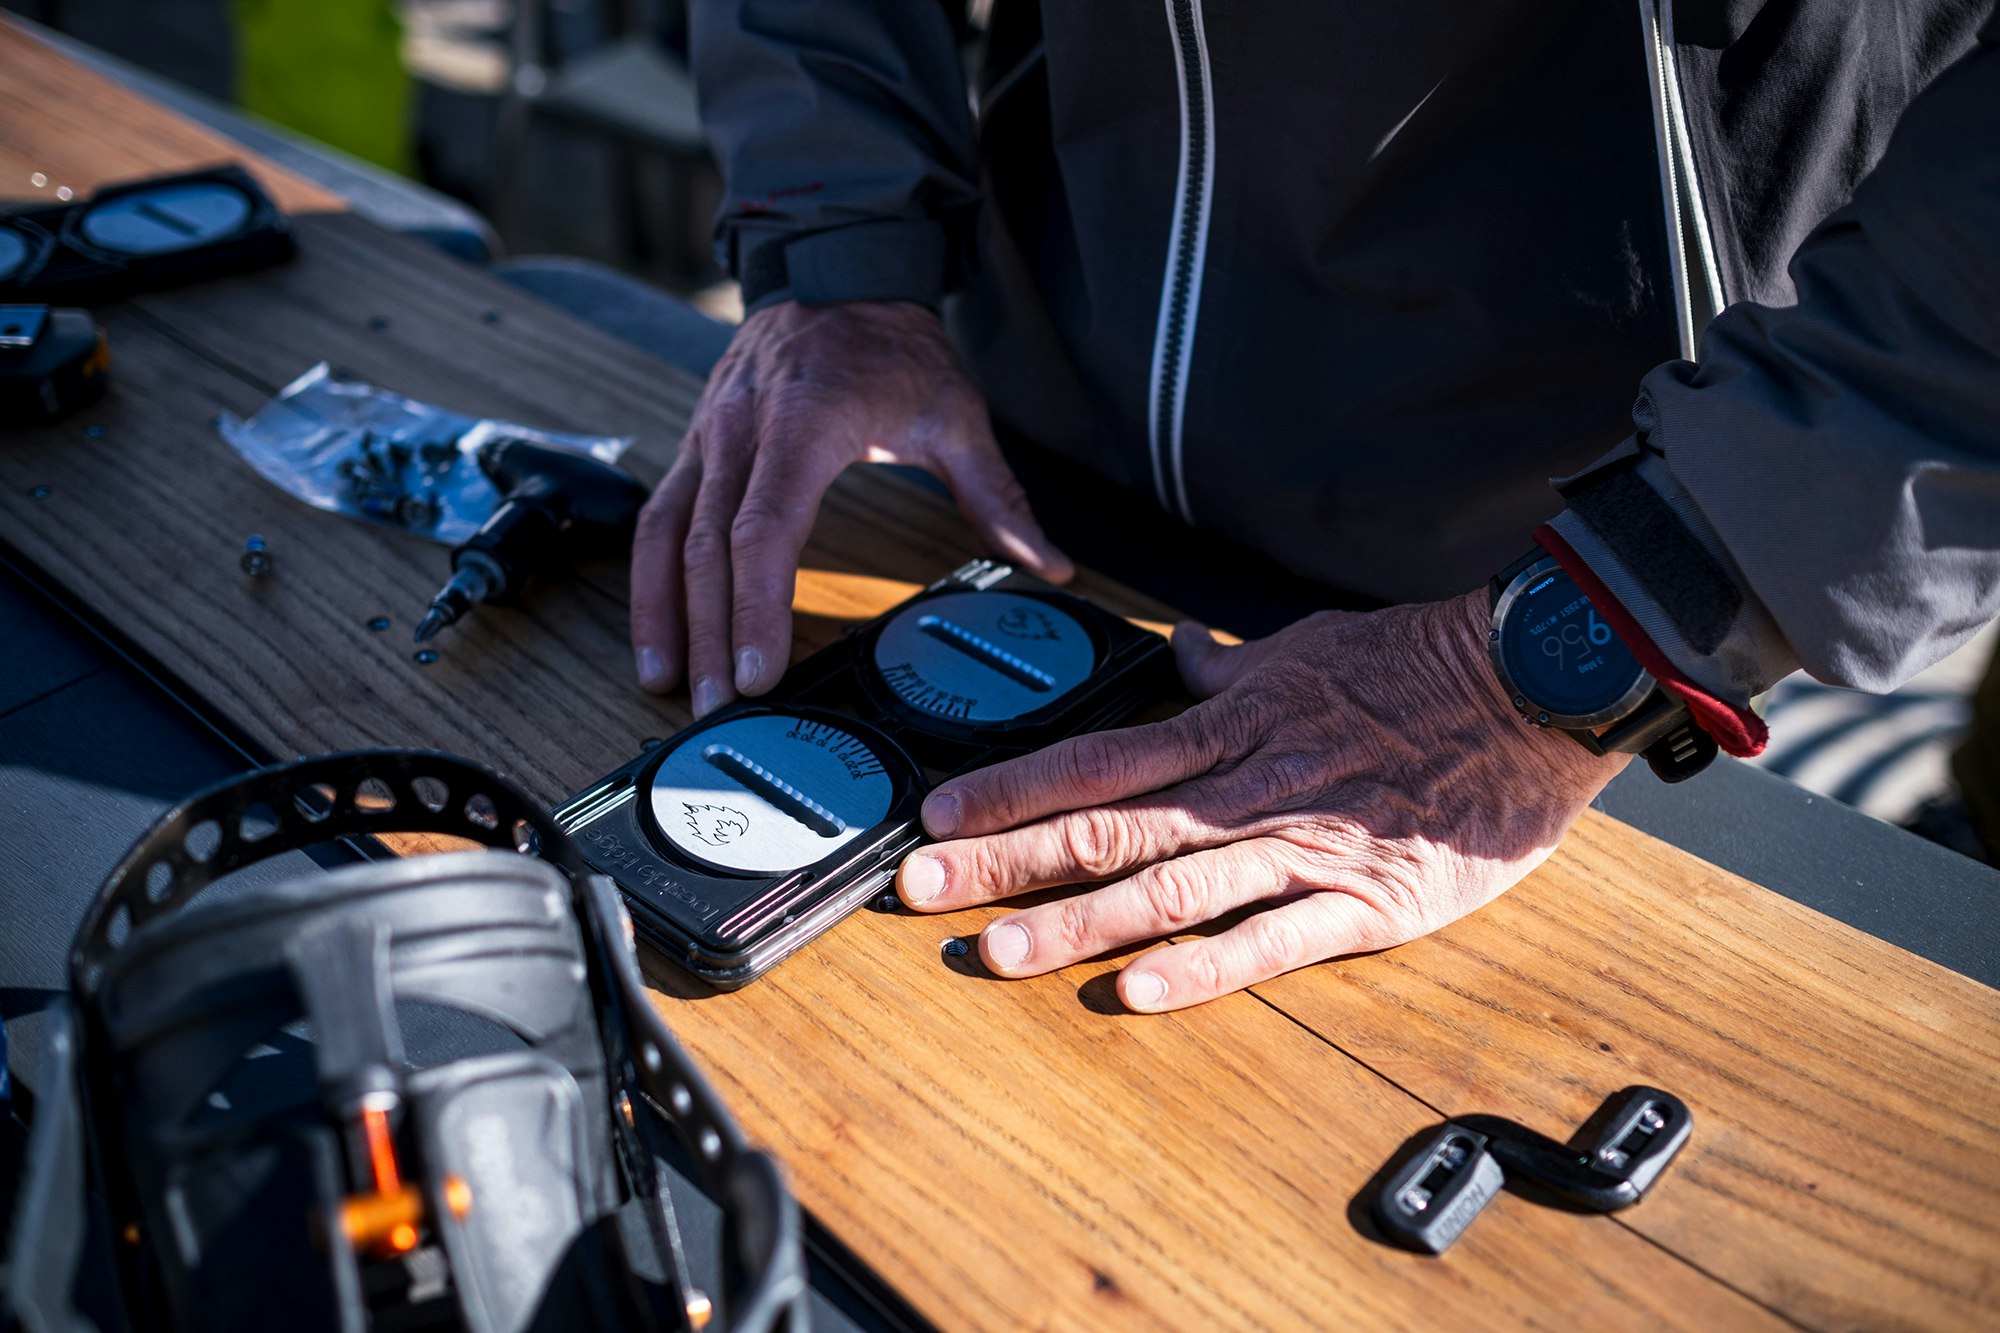
Using a certified digital scale, we measured the weight of one full binding (i.e. one two piece + one heel piece), then each piece separately, and finally the screws provided. Weight is expressed in grams. This season, we’ve also measured the height of the toe and heel pins from the top of the ski.
BINDING RELEASE MECHANISMS
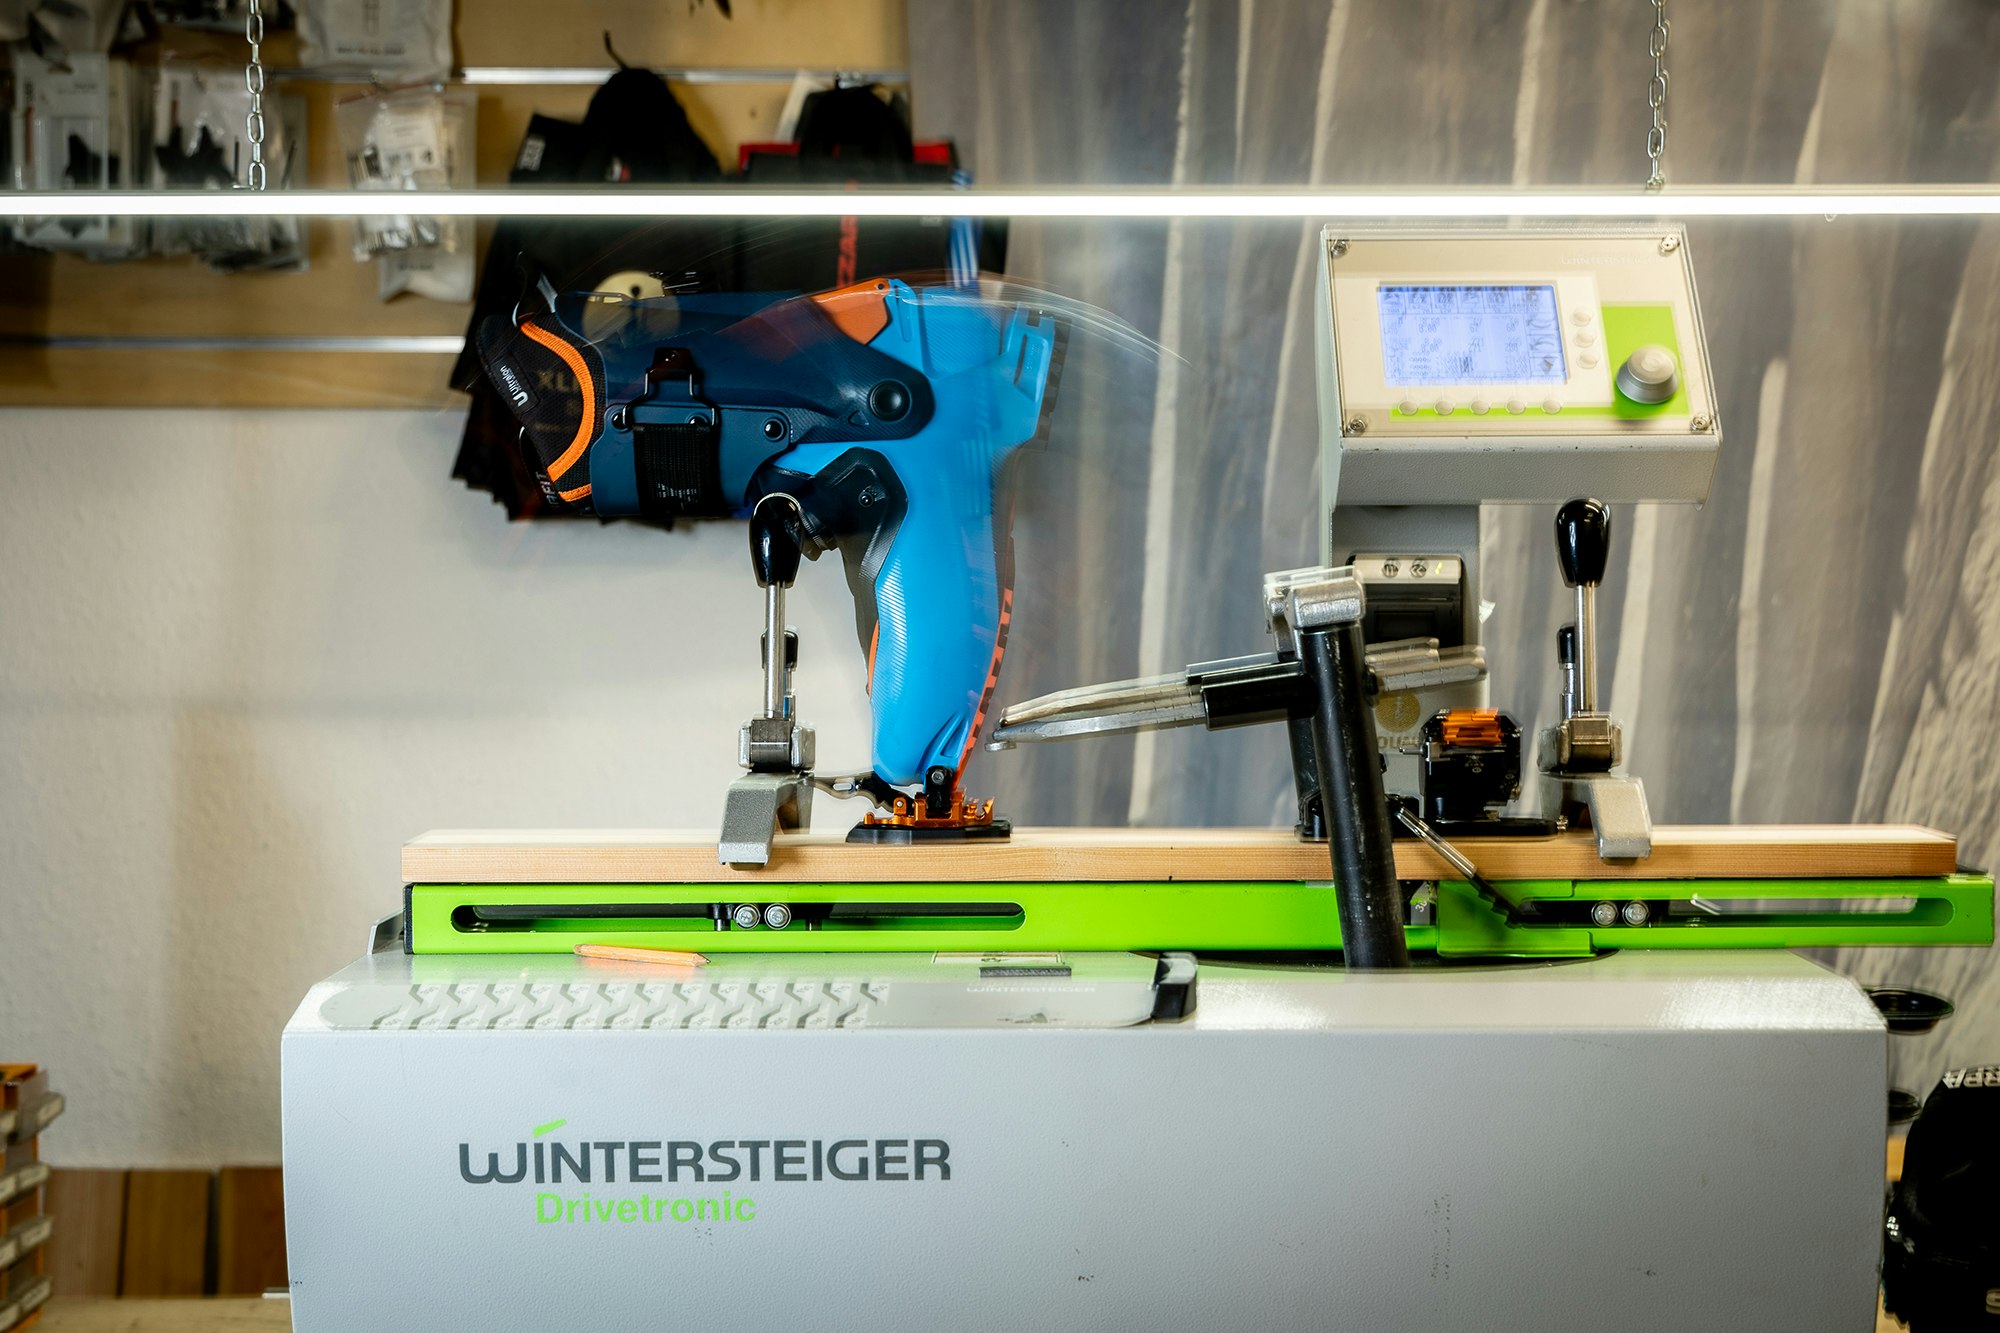
To evaluate the release mechanisms, we used the Wintersteiger Drivetronic. See the related chapter for more information.
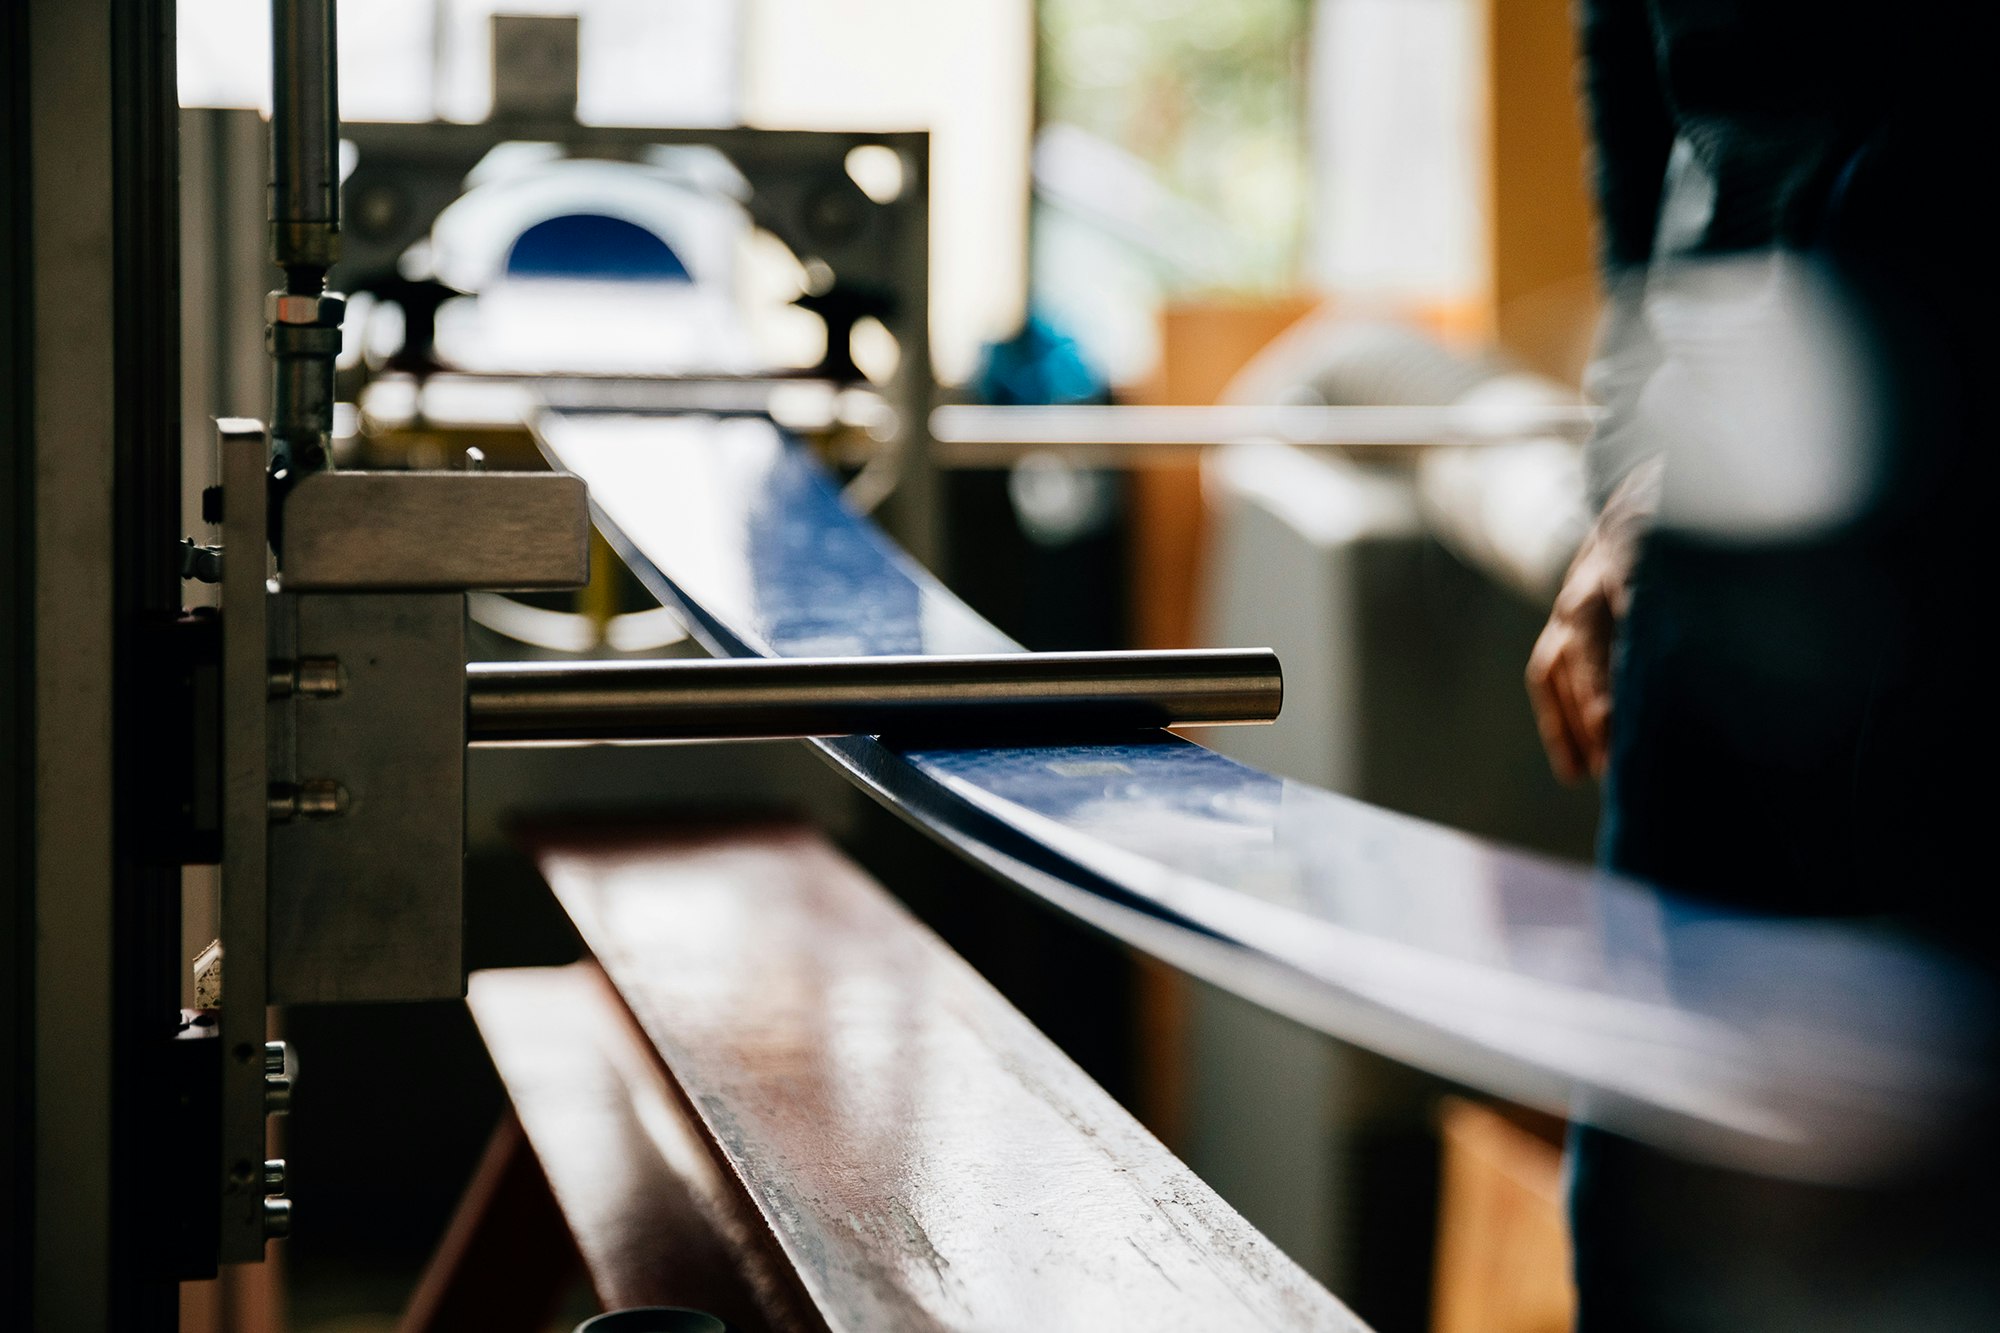
03 - HOW WE SET UP THE SKIS FOR TESTING
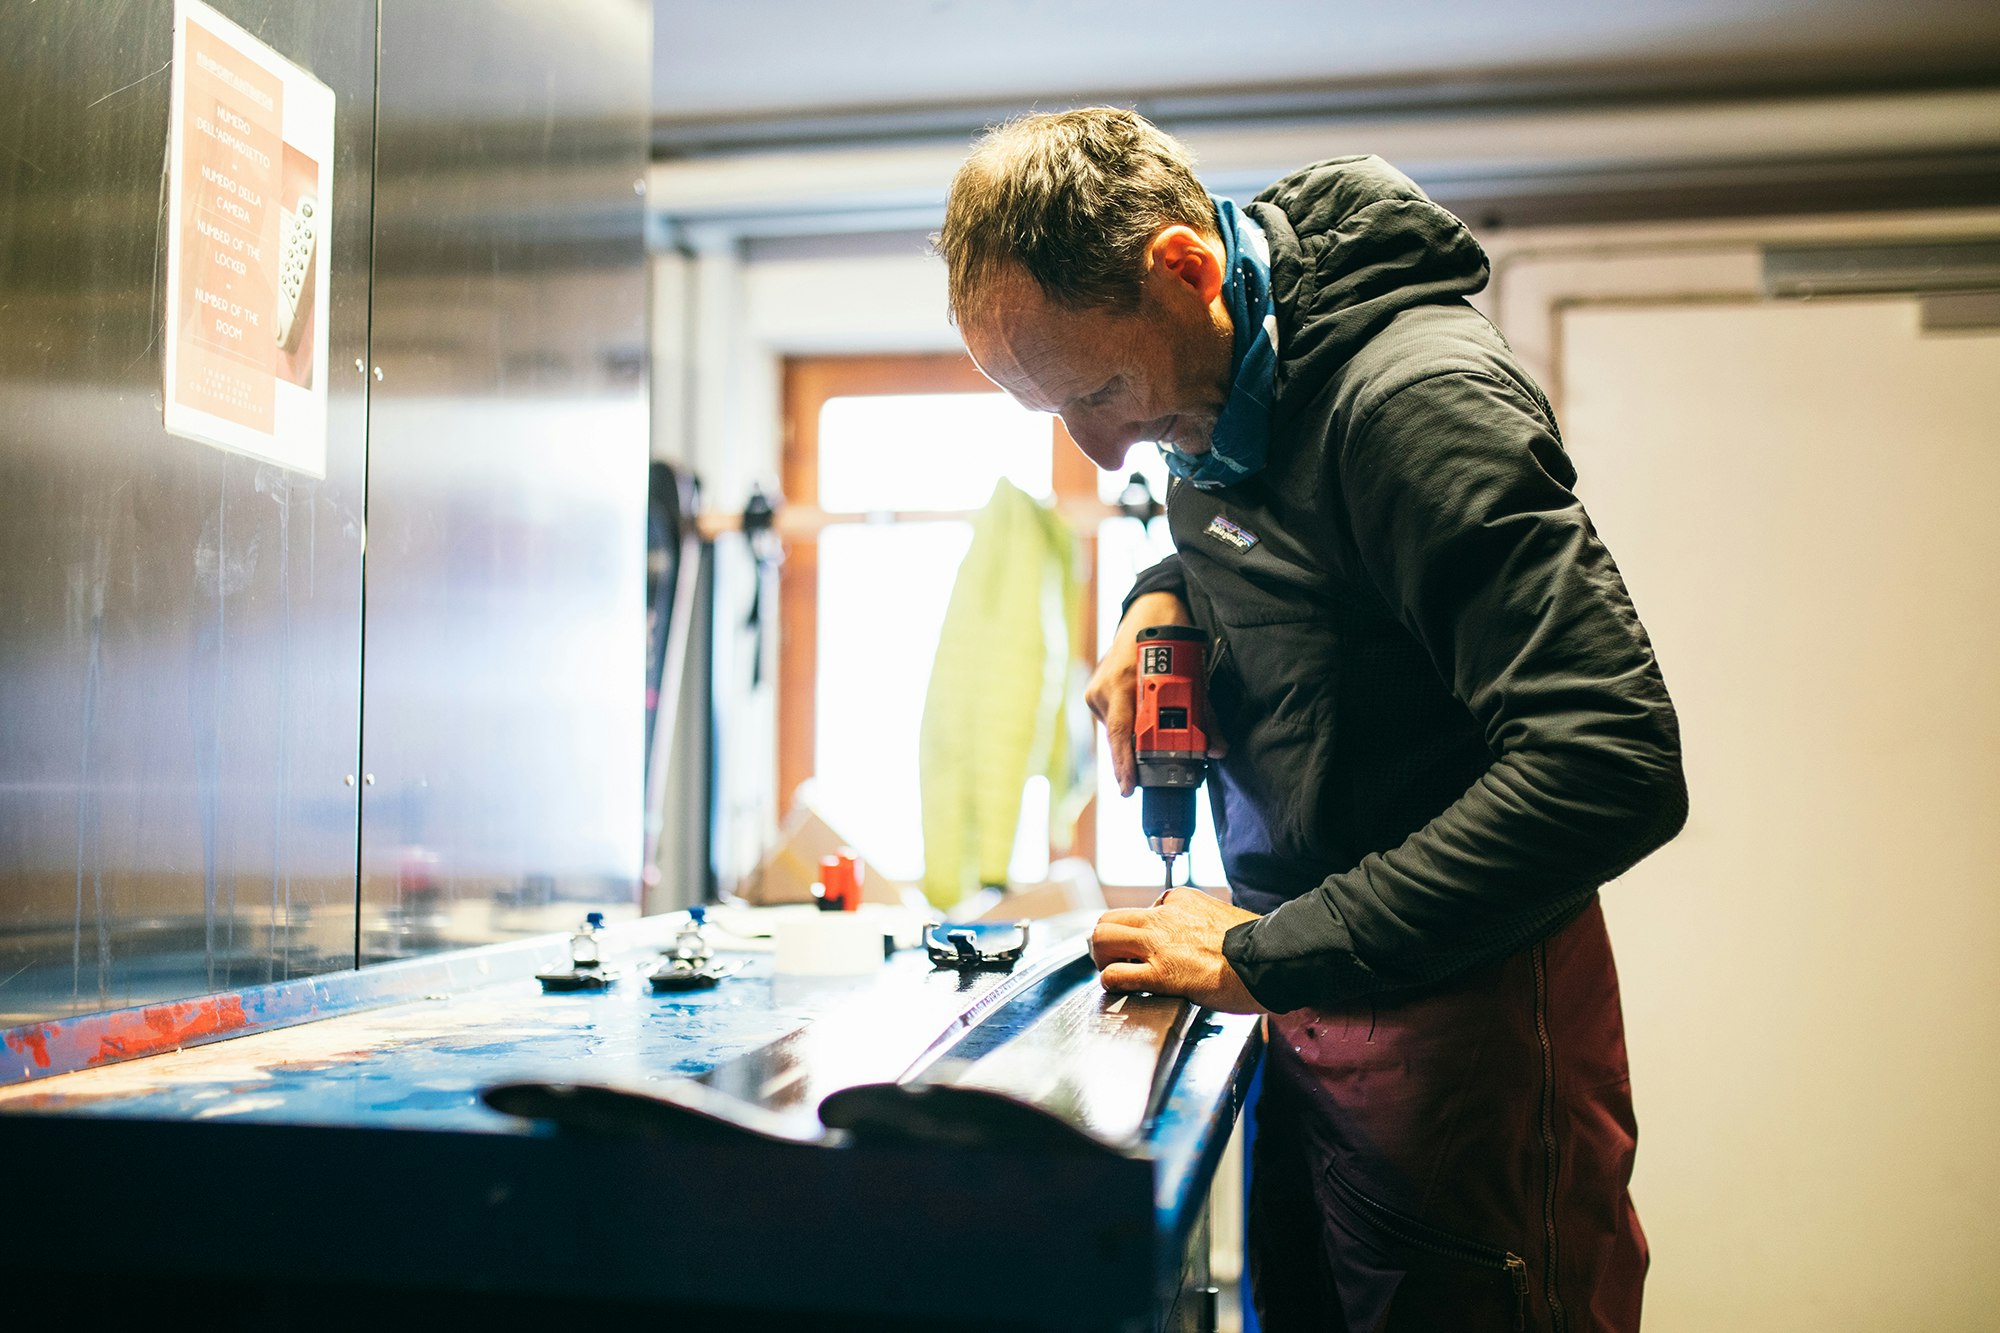
For the twelfth season in a row, we used ATK bindings on all the skis we tested for the ski mountaineering sections of the Buyer’s Guide.
We feel that it is essential for the skis in each category to have identical setups for uniform performance and to enable the testers to evaluate the skis with the same boots (their own) and the same bindings. The skis, which were, as always, provided to us new, were then assembled by XL Mountain, an official ATK reseller, who used the drill patterns provided by the manufacturer to ensure the bindings were mounted properly. The holes were filled with silicone before inserting and tightening the screws. Here is how we selected the various models for the Buyer’s Guide, which we have always adapted to prevailing trends in each category of skis.
Race: We used the top-of-the-line ATK Revolution Brake World Cup with heel and adjustment plate.
Light touring: Here, we opted for the ATK Kuluar 12 for the right combination of performance and light weight for the current definition of this category.
Touring: For our Tour category, we used the ATK Raider 12, or the Raider 13 Evo for the heavier skis.
Freeride: The skis in this category are probably too heavy and stiff for a pin binding on the descent, although there are those who do it. We’ve gone with the Ski Trab TR1 here, or ATK Freeraider 15 Evo on skis that are a bit less stiff.
Women’s: For the ladies, we went with the ATK Raider 10.

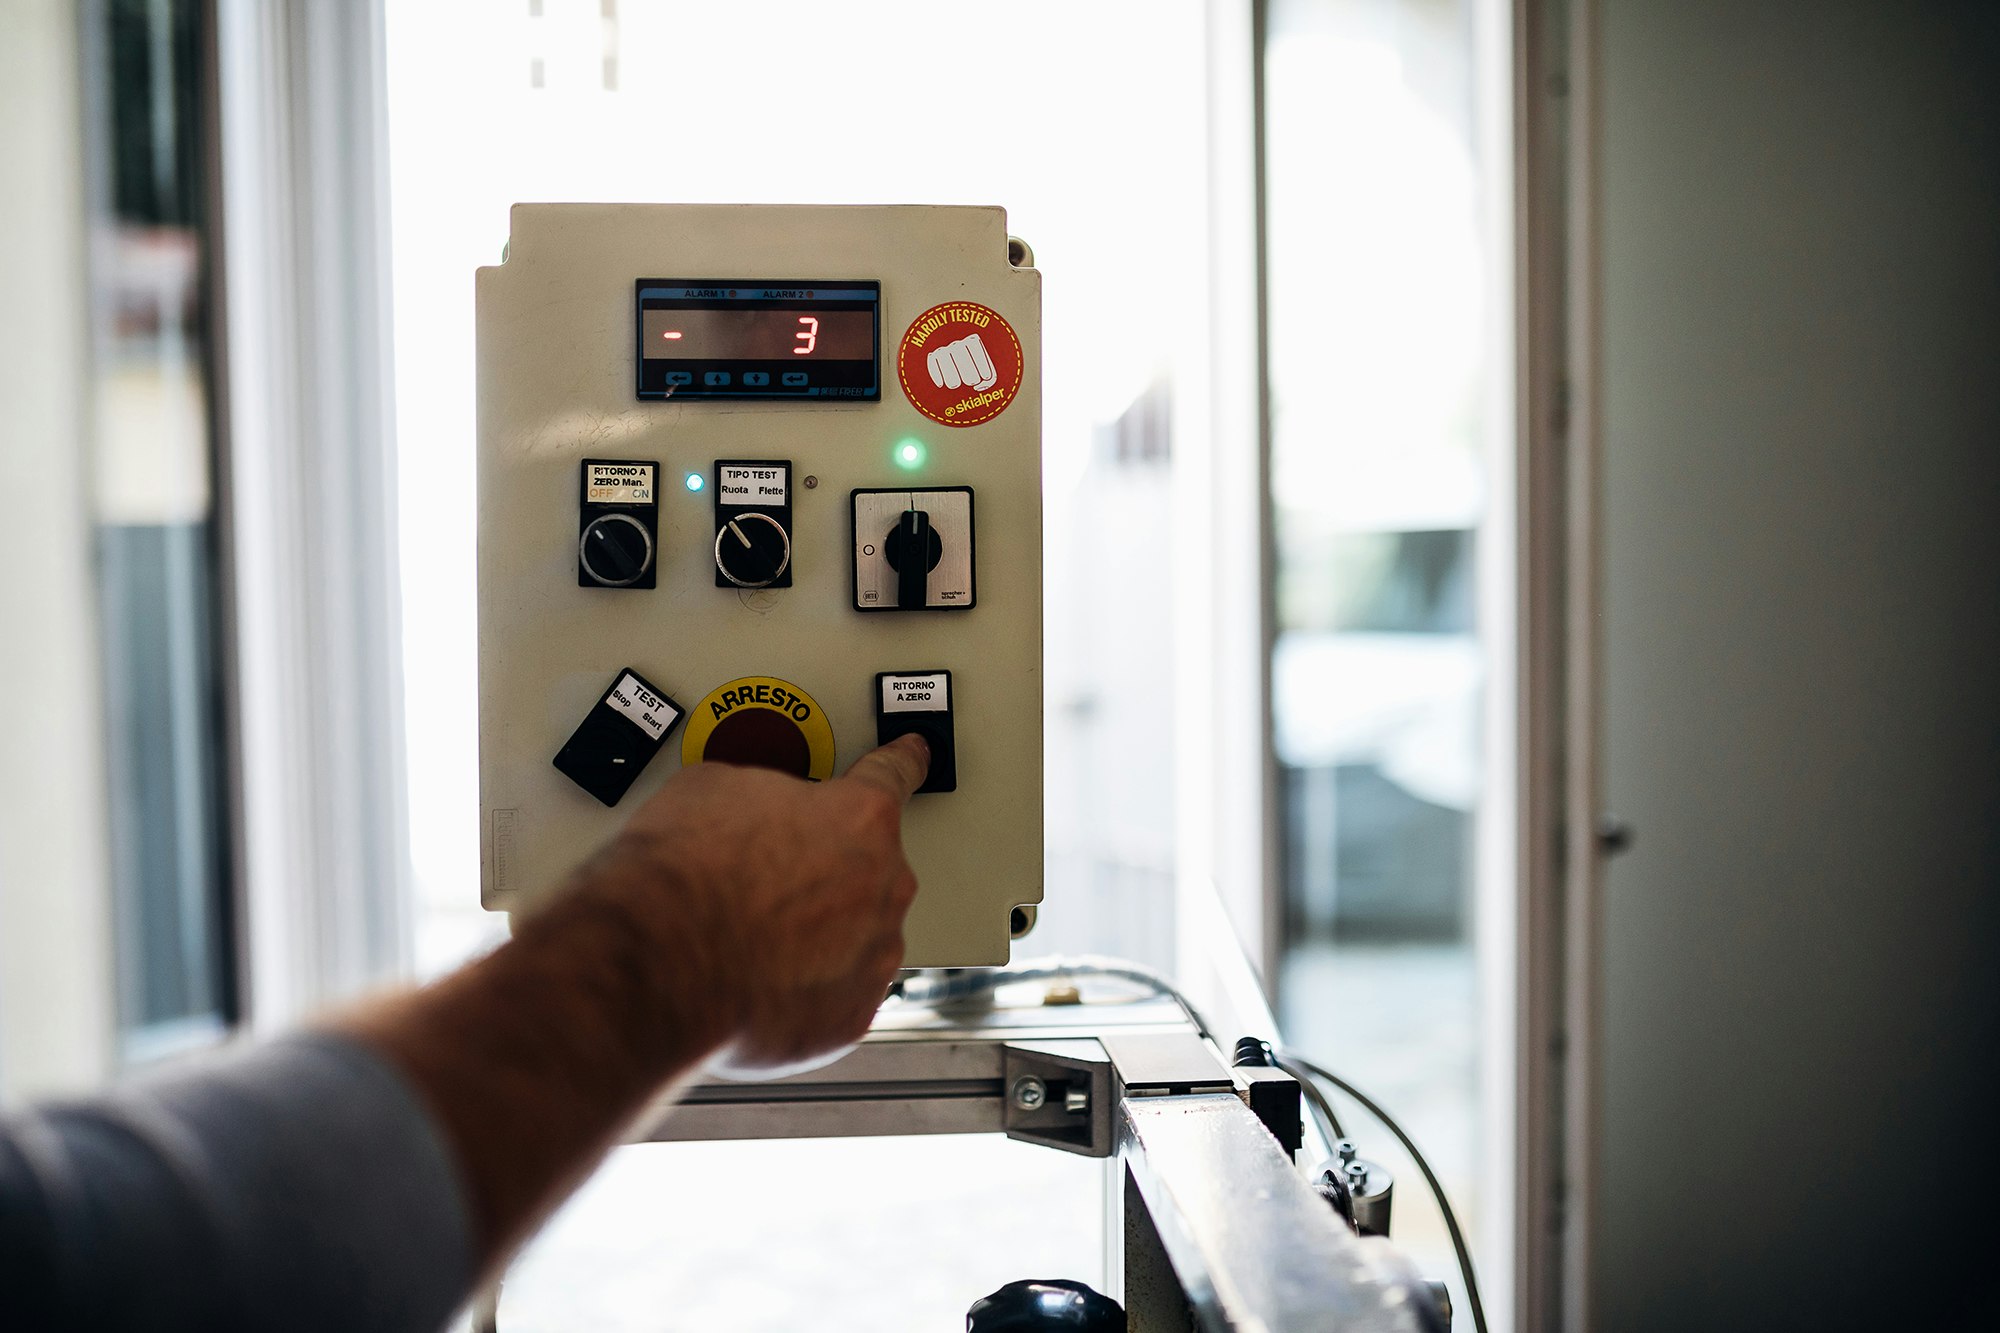
04 - WINTERSTEIGER-APPROVED BINDINGS TESTS
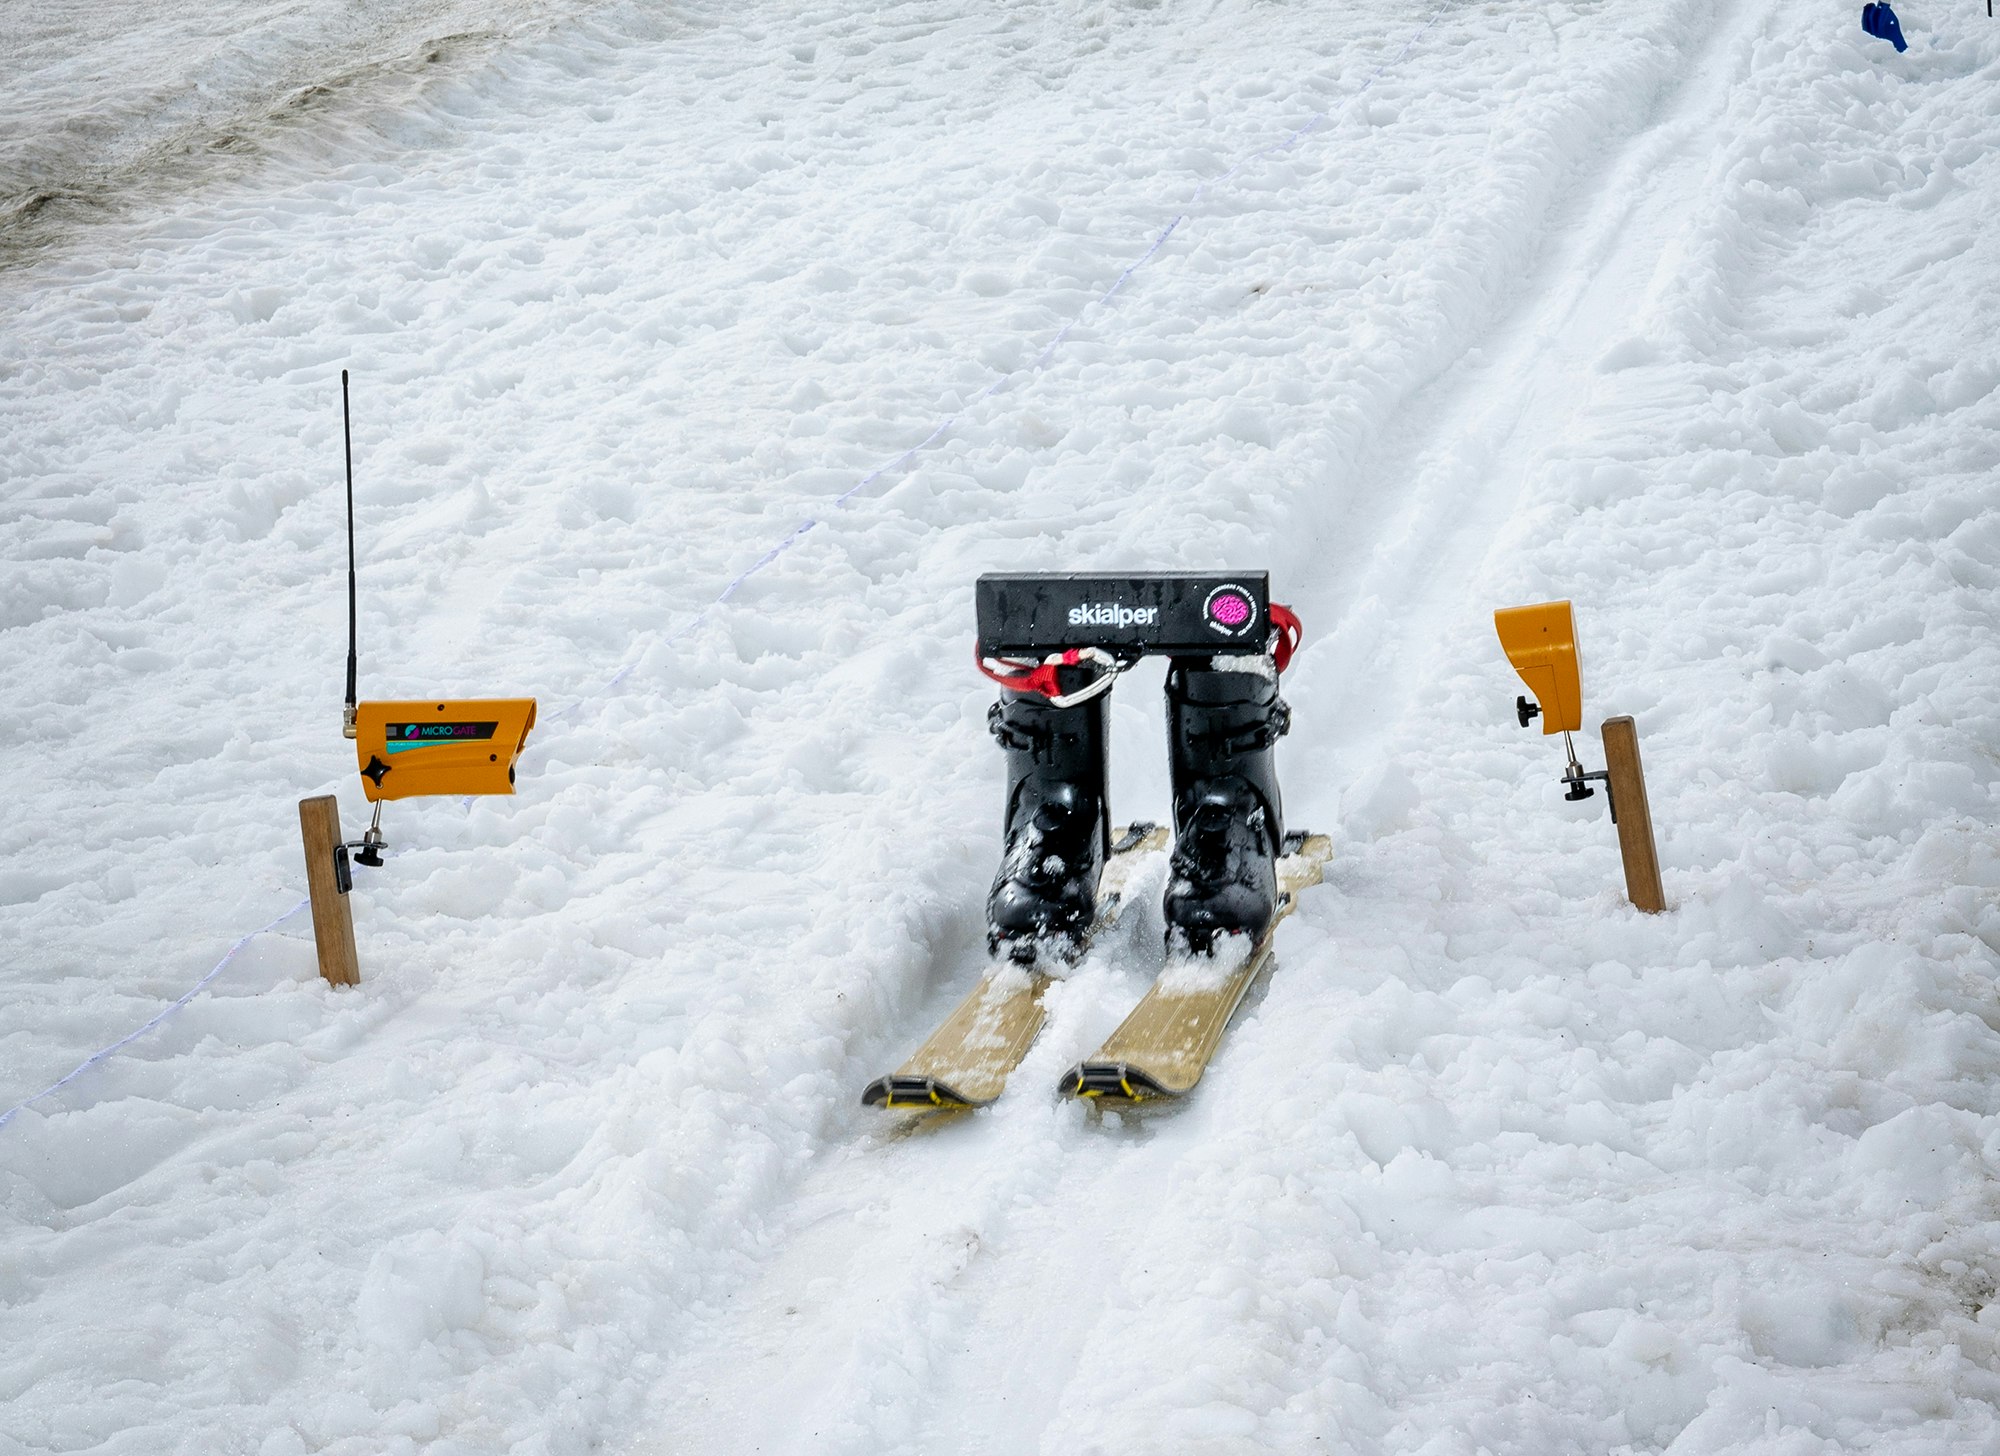
Again this year, we’ve turned to the standard-bearer of DIN-compliant binding adjustment and testing, the Wintersteiger Drivetronic to conduct hundreds of tests with the help of the staff at XL Mountain.
We should note, though, that skimo bindings are not required to comply with DIN safety binding standards, so our testing does say if a binding is good or not, or if you should buy it or not. It is, however, the only reliable, certified and incontrovertible test bed with which we could have compared the various models. If you’re not an expert, you might be wondering how exactly a binding is tested. The answer is simple: The Wintersteiger Drivetronic measures the toe, heel and lateral release values based on a series of settings, which we’ve held constant over the years in order to have greater consistency in our results. We’ve adopted the following ranges based on the averages for all participants: height from 167 to 178 cm (5’6”–5’10”); weight from 67 to 78 kg (148-172 lbs); skier level of 3 (i.e. advanced). We used these parameters to set the level of tolerance within which the binding should correctly release. You will find a smiley face for those bindings that deviate by no more than 10% from that tolerance, an expressionless face for those that fall within a range of 10-20%, and a sad face for those that are higher than 20%. So, it’s a bit like the green, yellow and red alert system in the military. In other words, the risk that your binding doesn’t release properly corresponds to what risk there is of your joints and bones breaking.
OUR APPROACH
As we have done for the previous editions of the Buyer’s Guide, we’ve mounted the bindings on hardwood boards so that the results would be uniform and not affected by the consistency of the various topsheets on the skis (and so that we wouldn’t have to drill holes in dozens of pairs of identical skis). We mounted the bindings taking great care to perfectly center the manufacturers’ drill patterns and use proper lubrication. I mean, we did a good job. Then we tested each binding using the most common types of inserts on the market: Dynafit’s Quick Step-in and Master Step; the La Sportiva system; and the Salomon/Atomic system. So for each binding, we conducted 12 release tests: 4 right lateral release and 4 left lateral release at the toe; 4 forward release at the heel.
THE RESULTS
Exactly how we explain the results of these tests has been a constant topic of discussion at meetings of the Skialper technical team, because it’s no easy task to translate a bunch of numbers into practical indications as to how a binding releases. Or rather, it’s not easy to explain why the numbers are not quality scores. Over the years, we started out providing a histogram of our measurements, then of the averages and combined results to calculate eight percentages. These were then shown in histograms that used that same three-color “alert” scale (green, yellow, red) to show how much a binding deviates from a perfect value (i.e. zero). These percentages were based on weighted averages of the actual figures and those used to configure the testing equipment. Two years ago, we came up with a parameter that enabled us to convert these figures into a scale from one to ten, where one to four got a frowny face, four to eight got a neutral face, and eight to ten got a smiley face. This was more intuitive, but it came with the risk that the scores on the scale would be seen as quality ratings, which they aren’t. This is why, from this year, we have decided to get rid of any numerical scale and just leave the emoticons for each of the four values related to left/right lateral release and heel release (i.e. two emoticons for the Dynafit-certified inserts and two for the others). This is an average of left and right and of the various types of inserts. This hasn’t been done to hide the data, but is simply an effort to provide more intuitive indications.

THINGS TO CONSIDER
This isn’t a definitive assessment and may mean everything, or nothing at all. Testing was conducted under ideal conditions, with new pins and perfectly mounted bindings. But it gets even more complicated. Imagine you’ve got worn pins and inserts, loose bindings. (A lot more people than you might think do! Have you checked yours?) How well would those work? Or how much would the results change when your skis flex and your boot gets pressed against the heel (such as in the middle of a tight turn, landing a jump, or hitting a dip or compression)? We just ran some simulations, and the results weren’t very encouraging. The worst of all is when the front lever is locked in walking mode. If you still ski like that, consider yourself warned. It should also be said that we’ve seen an amazing improvement over the years in the mechanics of bindings, as well as in their reliability and attention to detail. Another thing that we’re seeing more and more is that inserts and bindings from the same manufacturer always work in greater synergy with each other. There are bindings you can get into just by thinking about it. You just need to get your boot near it to hear that reassuring “clack”. The levers work great, and the heel risers and adjustment mechanisms keep getting easier and more intuitive.
COMFORT
In addition to our release tests, we also looked at how easy it is to lock into the pins and open them with a pole or with gloves. Here, too, our scores — on a scale of zero to three — are based on averages of the various combinations of boot and binding, divided by Dynafit and the other inserts.
05 - SPLITBOARDS & CO
Last year, we brought back our tests of splitboards and related boots and bindings.
The spec sheets are different from those of the skimo skis and boots, but they’re still intuitive (with only a minor changes or additions from last season), and the numbers are all as declared by the manufacturer, with the exception of boot weight, which we measured. The spec sheets for poles, helmets, ice axes, crampons, harnesses, and avalanche and rescue gear are also different and simplified. Any special figures are explained in their respective forewords. When testing the splitboards on the snow, each tester used their own personal setup, in terms of both stance and actual board setup (i.e. using their own boots and bindings), so as to get feedback that was as precise and reliable as possible.

06 - SKINS
This year, for the first time, we’ve added actual testing to our experience as users of skins over the years.
Our goal is to continue expanding these tests to analyze various aspects of the skins in a range of real-world conditions. For now, we have started with glide tests, putting the skins on the same ski to measure glide speed, glide time (between two timing gates at a distance of 25 meters), and total glide distance. See the related section for more information on the test parameters.
07 - OUR AWARDS
We select a limit set of products in each category. We do this based on our measurements, lab tests, tests on the snow, and instrumentation tests.
And we do it after extensive discussion and sharing of experiences. We even change our minds sometimes. We recognize the importance of this moment, so it is a responsibility we take seriously. We know that we’re recognizing the efforts of a great many people who designed and produced these skis, boots and bindings, all of whom believe deeply in their products. At the end of the day, though, when the Buyer’s Guide comes out, we can be confident that all the work we have done is both free from bias and intellectually honest.
PRO’S CHOICE, PEOPLE’S CHOICE, SMART CHOICE
After years of always handing out awards in the same way, this year we’ve decided to make a change. It’s no longer about the product of the year and the short list of other products considered. Now we have the product of the year three choices.“Pro’s Choice” is the product of the year for professionals and other demanding experts. The best ski for people who truly know what to do with it, let’s say. Or the boot that does exactly what you want from it, even if it wasn’t designed for comfort or for keeping your feet warm. The “People’s Choice”, then, is the best product for the vast majority of skiers interested in the given category. But this doesn’t mean boring products for the masses, because from the start we’ve selected the most interesting products that we wanted to test. Finally, the “Smart Choice” is awarded to an interesting product that might not be for everyone. It might be great for the value it provides for the money or for some other specific reason. In certain categories where we’ve tested fewer products, though, we’ve maintained the single “Product of the Year”.
Share this article


Weighing from less than 100 grams to nearly a kilo, the common denominator are the pins into which you stick your boots and that enable you to climb. From the revolution of the pin binding to the latest hybrids for freeriding, here are all the best bindings the skimo market has to offer.


The word ski mountaineering encompasses skiing and alpinism. The calling to head high, to reach summits, ridges and the most spectacular vantage points, and then don your skis, often inevitably requires you to use mountaineering equipment. In order to make the right choice, you need to understand how it works and know how to use it.


Probably The most accurate ski test out there.